
heart stamped spiced brown butter sugar cookies


Okay…I feel like I need to give a bit of background info before we jump right into talking about these cookies! I have a history of luckiness….as in, I have won an absurd number of contests in my life! Free airline tickets, workshops, prints, blankets, cookware, etc. You get the picture. Ha! As a kid I once had my name drawn TWICE at a 5K run I was part of…and had to give up my second prize of an overnight stay in Whistler because I was honest, and told them I had already won something. HILARIOUS.
Anyway, I do enter a ton of contests, so maybe that’s why I’m always winning? And let’s just say that my lucky streak is a bit of a running joke among my friends. Now, Rebecca from Displaced Housewife released her amazing Cookie Book recently!! (Go buy it if you haven’t….it is AMAZING!). My roommate and I both were so excited about it, and I told her, don’t buy it yet because we’re going to win it. Pretty sure she thought I was crazy. BUT, a few instagram contest entries later…..my roommate won a copy! HAHA. Seriously so funny. So, we are proud owners of this cookbook, and have been loving it so so much so far. The olive oil cookies have been made MANY MANY times in our house already, and everything else we’ve tried has been fantastic. I really appreciate that Rebecca includes so many everyday type cookies, that aren’t intimidating or too fancy for an everyday treat, but still so delicious. And of course there’s a few showstoppers as well!
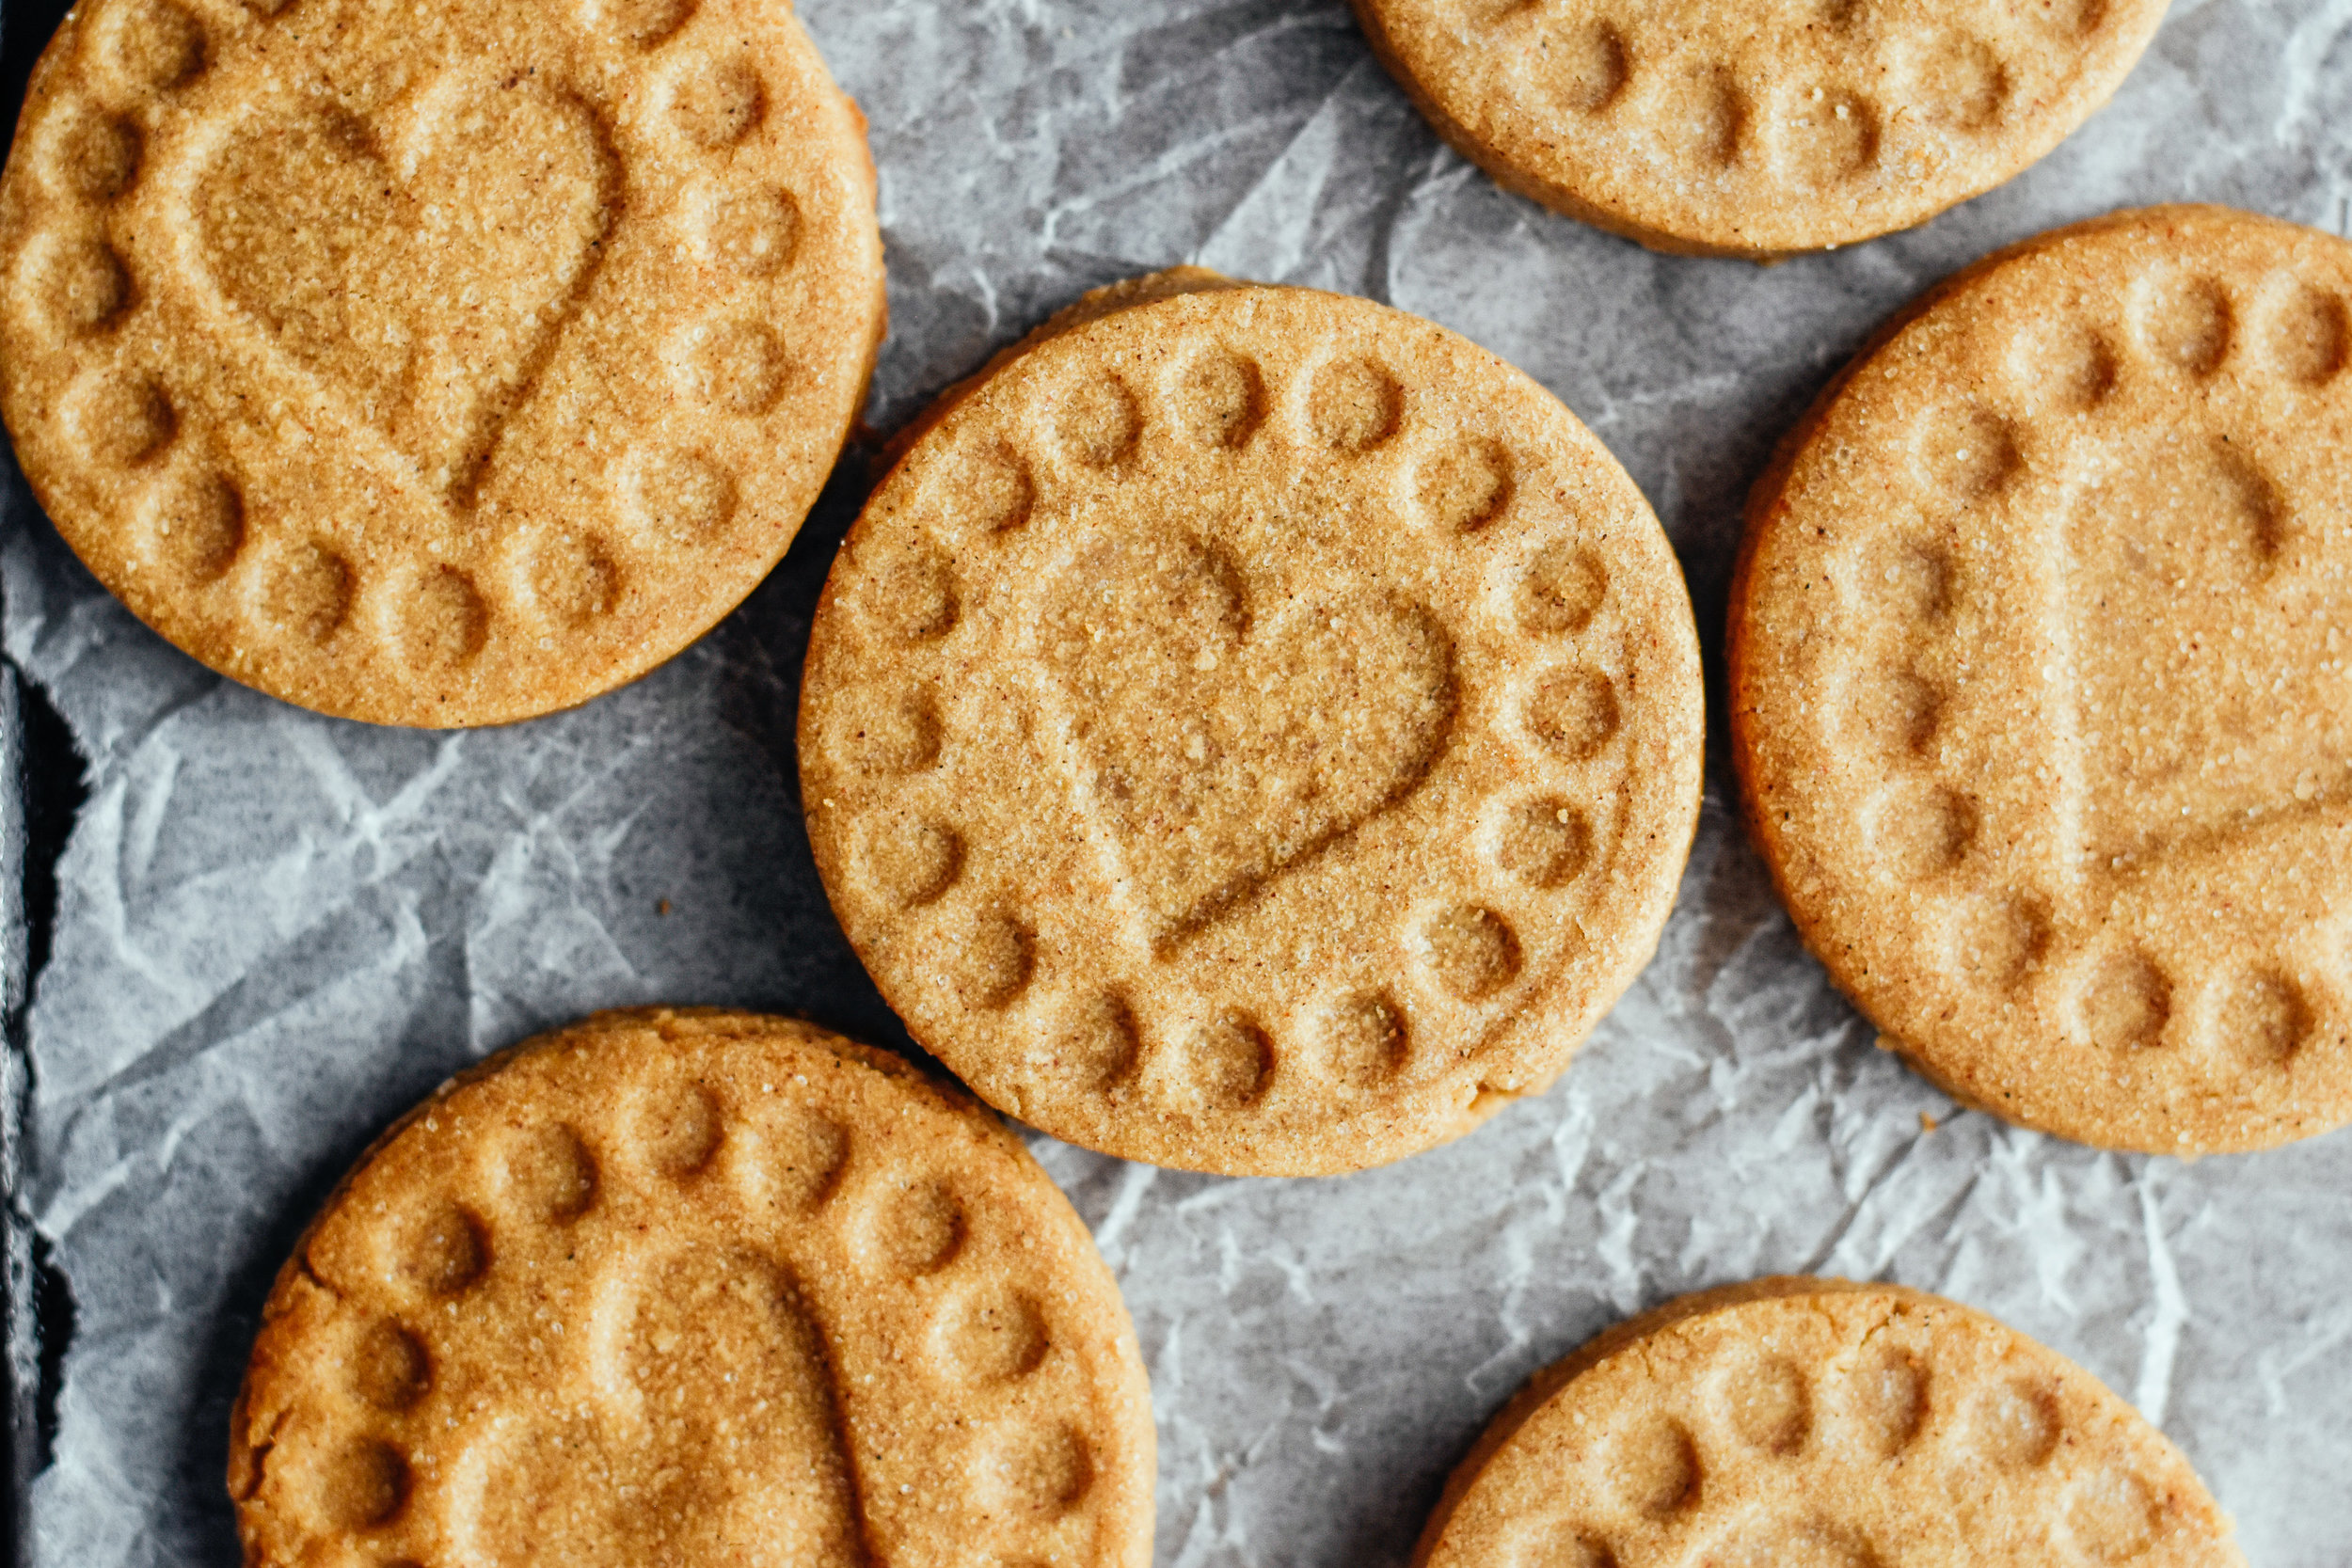
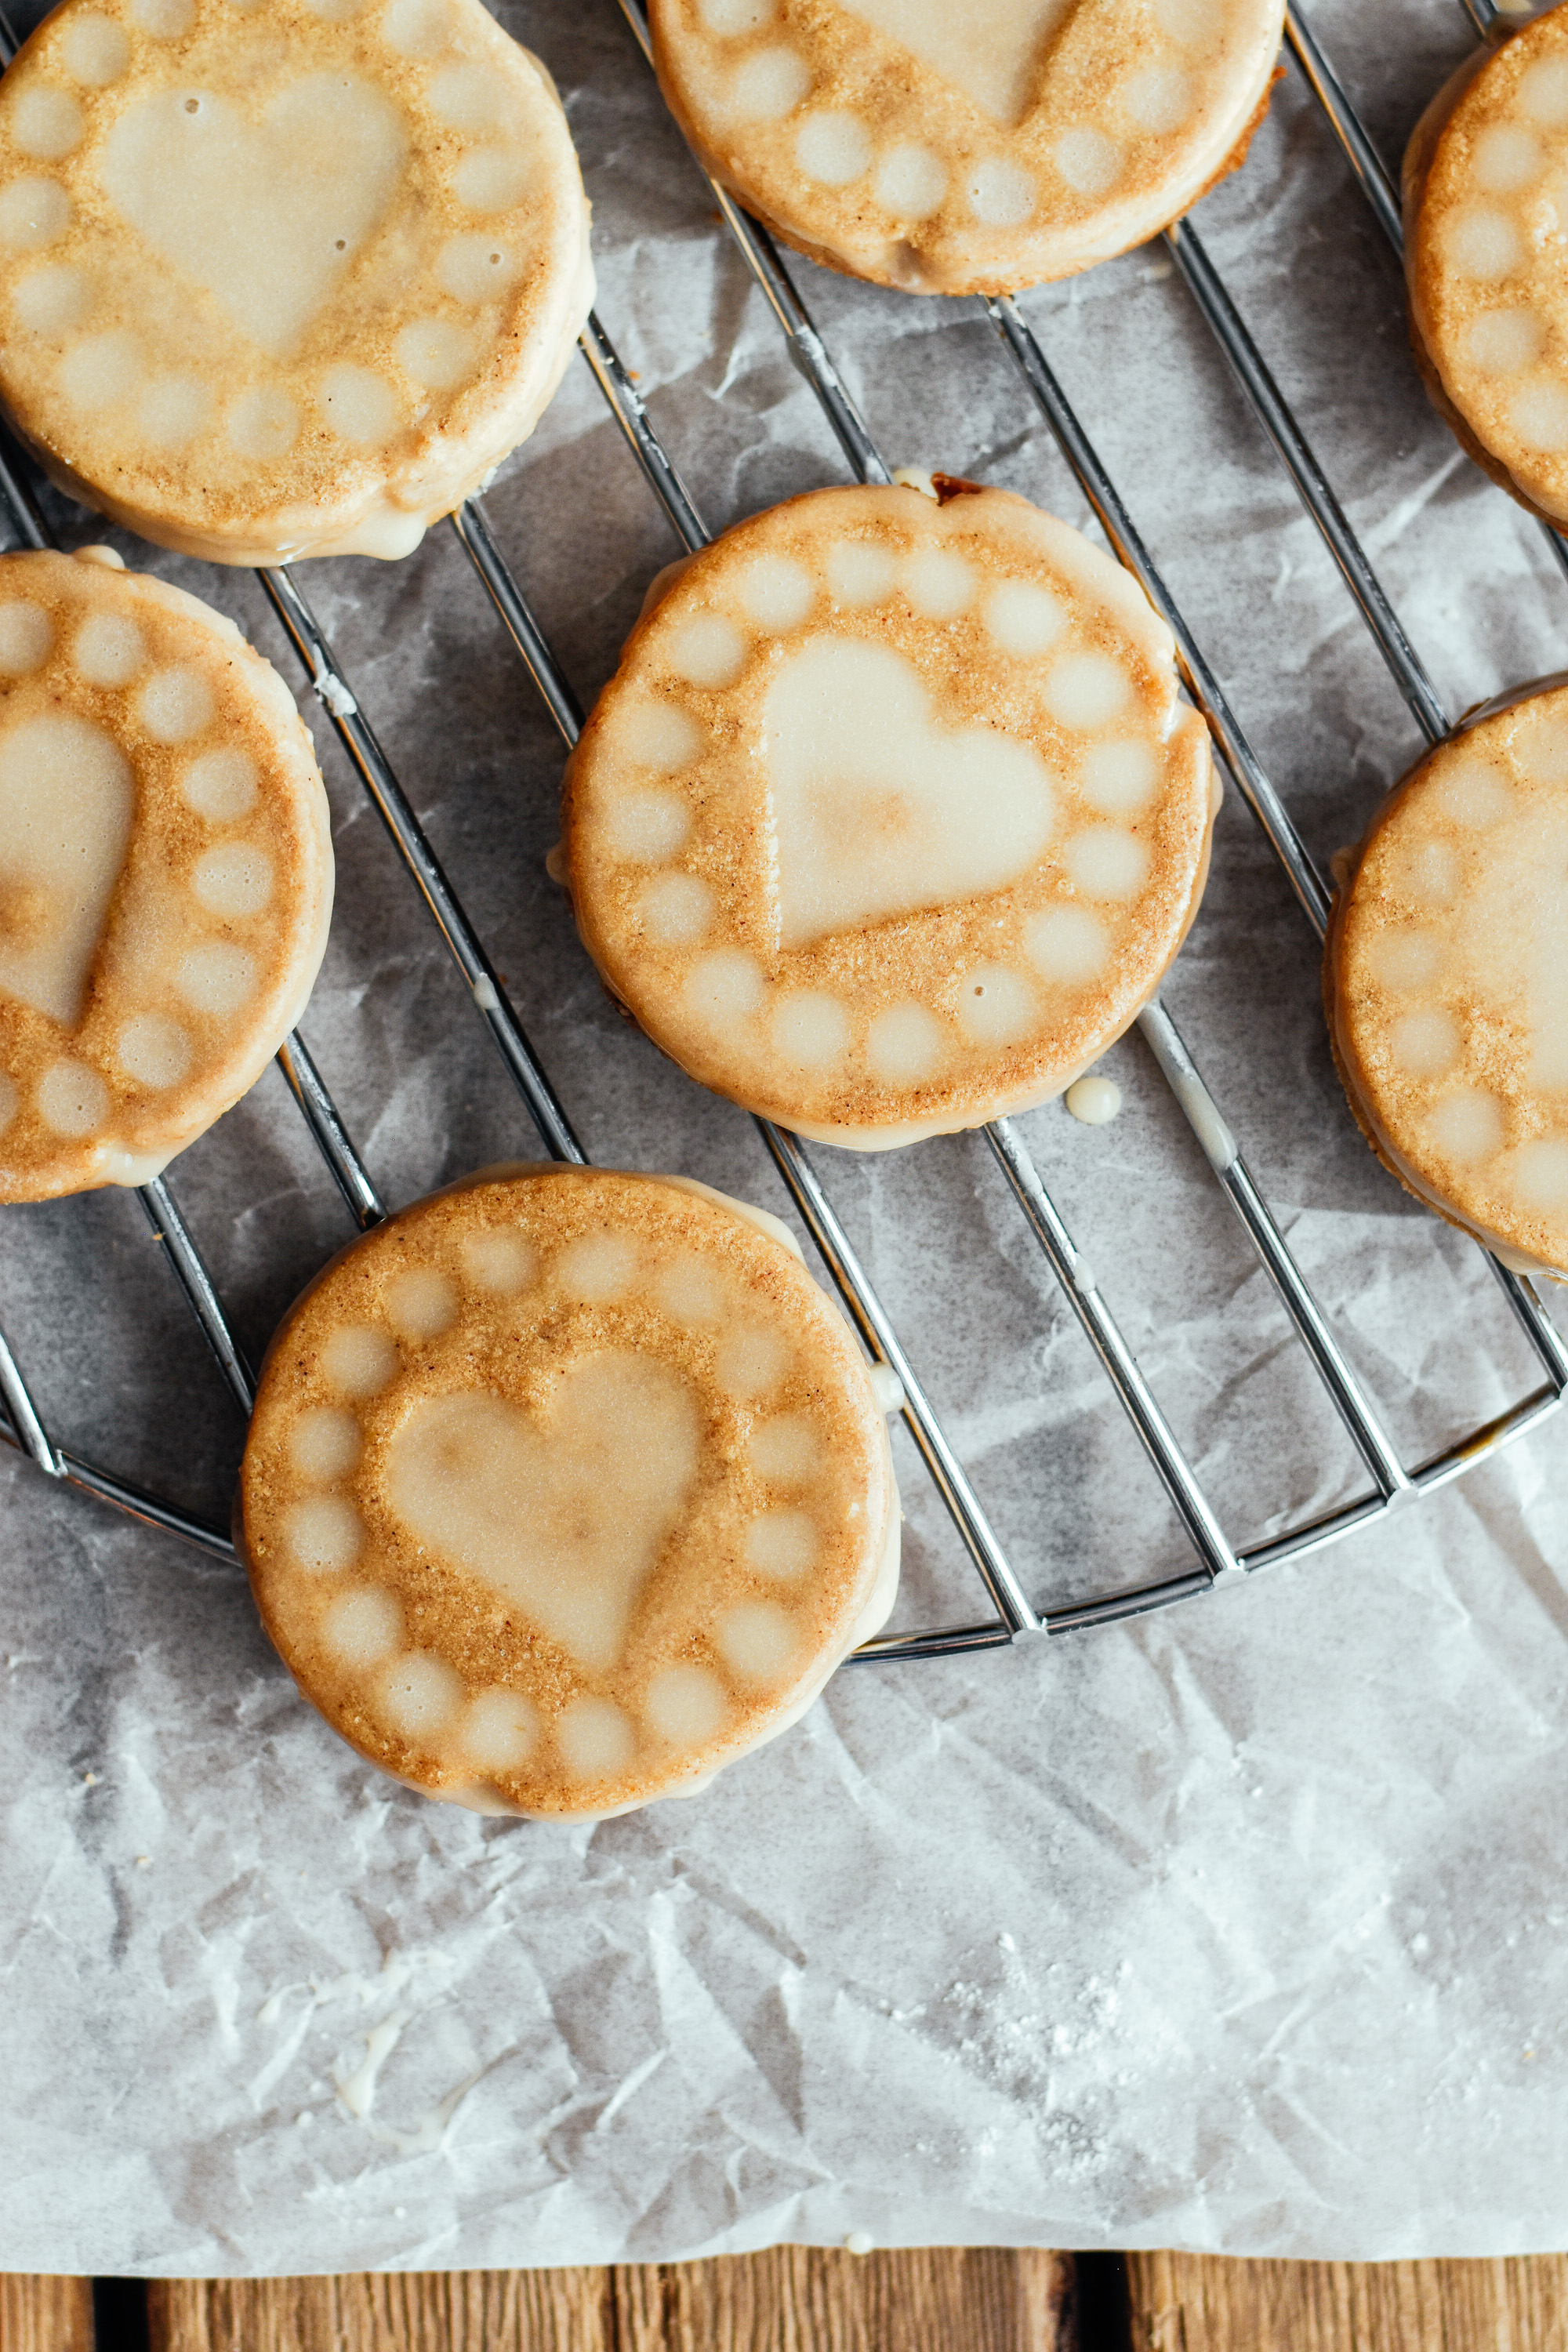
I decided to make these brown butter stamped cookies since I’ve had a cookie stamp for a while now, and haven’t ever used it! I will say that these cookies are a tiny bit more work than your usual “scoop and bake” cookie, since there’s a few more steps and chilling involved. But they’re worth it! I also think the glaze could even be left off, as I found that for my subtle stamp, it made the design harder to see and the cookies were delicious without it too, but I know a lot of people loveee that added bit of sweetness. Either way, these are the coziest, warmly spiced cookies ever, and perfect for winter!
spiced brown butter muscavado sugar cookies
recipe published with permission: Rebecca Firth - Disaplaced Housewife - The Cookie Book
yields: about 24 cookies
ingredients
1 1/2 cups unsalted butter
1 cup muscavado sugar (Rebecca calls for Muscavado, but I didn’t have any on hand so I used dark brown sugar!)
1/2 cup granulated sugar
2 large eggs, room temp
1 tablespoon real vanilla extract
4 cups all-purpose flour (*Sub 1 cup for bread flour if you have it - I didn’t and it was fine without)
2 teaspoons ground cinnamon
1 teaspoon allspice
1 teaspoon cloves
1 teaspoon ginger
1 teaspoon sea salt
1/2 teaspoon cardamom
to make
First brown the butter. Start by placing the butter into a medium, heavy-bottomed saucepan, and melt it over a medium heat. Once it’s all melted, turn the heat to medium-high, and swirl the pan gently to stir. The mixture will start to foam, and small dark bits will begin to appear on the bottom. You should smell a nutty aroma as this happens. It will take about 3-5 minutes for it to brown, and keep swirling occasionally to stir. Once the butter is quite brown, remove from heat, and allow to cool slightly.
While the butter is cooling, get the dry ingredients ready. In a large bowl, combine the flour, salt, and all spices. Set aside.
Place the butter into a large bowl (the bowl of your stand-mixer if using one), and add in the muscavado and granulated sugars. Mix on medium speed until butter and sugars have completely combined. Add in the eggs, one at a time, and mix until completely incorporated. Be sure to scrape down the side of your bowl to make sure things are fully mixed. Add in the vanilla extract and mix for another minutes or two.
Slowly add the dry mixture into the egg mixture, and mix on low until the mixture comes together - will look like crumbs at first, so keep mixing!
Separate the cookie dough in half, and press each half into a disc - you may need to knead the dough, no need to be gentle here! The dough may crack, that’s normal, simply press the cracks together to smooth out.
Place the dough disc between two layers of parchment paper, and roll out to 1/2 inch thick. Repeat with the other disc. Slide the discs onto a baking sheet and place into the freezer for 5-10 minutes, or fridge for 10-20 minutes. You want your dough cold enough that the stamp doesn’t stick to it, but if it’s too cold then it will be tough to stamp.
Prepare a few cookie sheets with parchment paper or a silicone baking mat, and set aside.
Pull dough out of the freezer/fridge, and dip the cookie stamp you’re using into a bit of flour, tap off excess, and press firmly into the dough to get a clear design. Use a round cookie cutter to cut around the stamped design. Repeat for all the dough, and use a flipper to move the cookies onto the prepared cookie sheets. Rebecca recommends a 2 1/2 inch cookie stamp for these. If you use a smaller or larger one, do a test cookie to figure out how to adjust the cookie time.
Place the cookies back into the freezer for 30 minutes to really set. This step helps keep your design firmly in place when it bakes.
Preheat the oven to 375 degrees F, and move the rack into the top third of your oven.
Take the cookie sheet directly from the freezer and place in the oven and bake for 9 minutes. You really don’t want to overbake these cookies! Let cool for 5 minutes, and then move to a cooling rack.
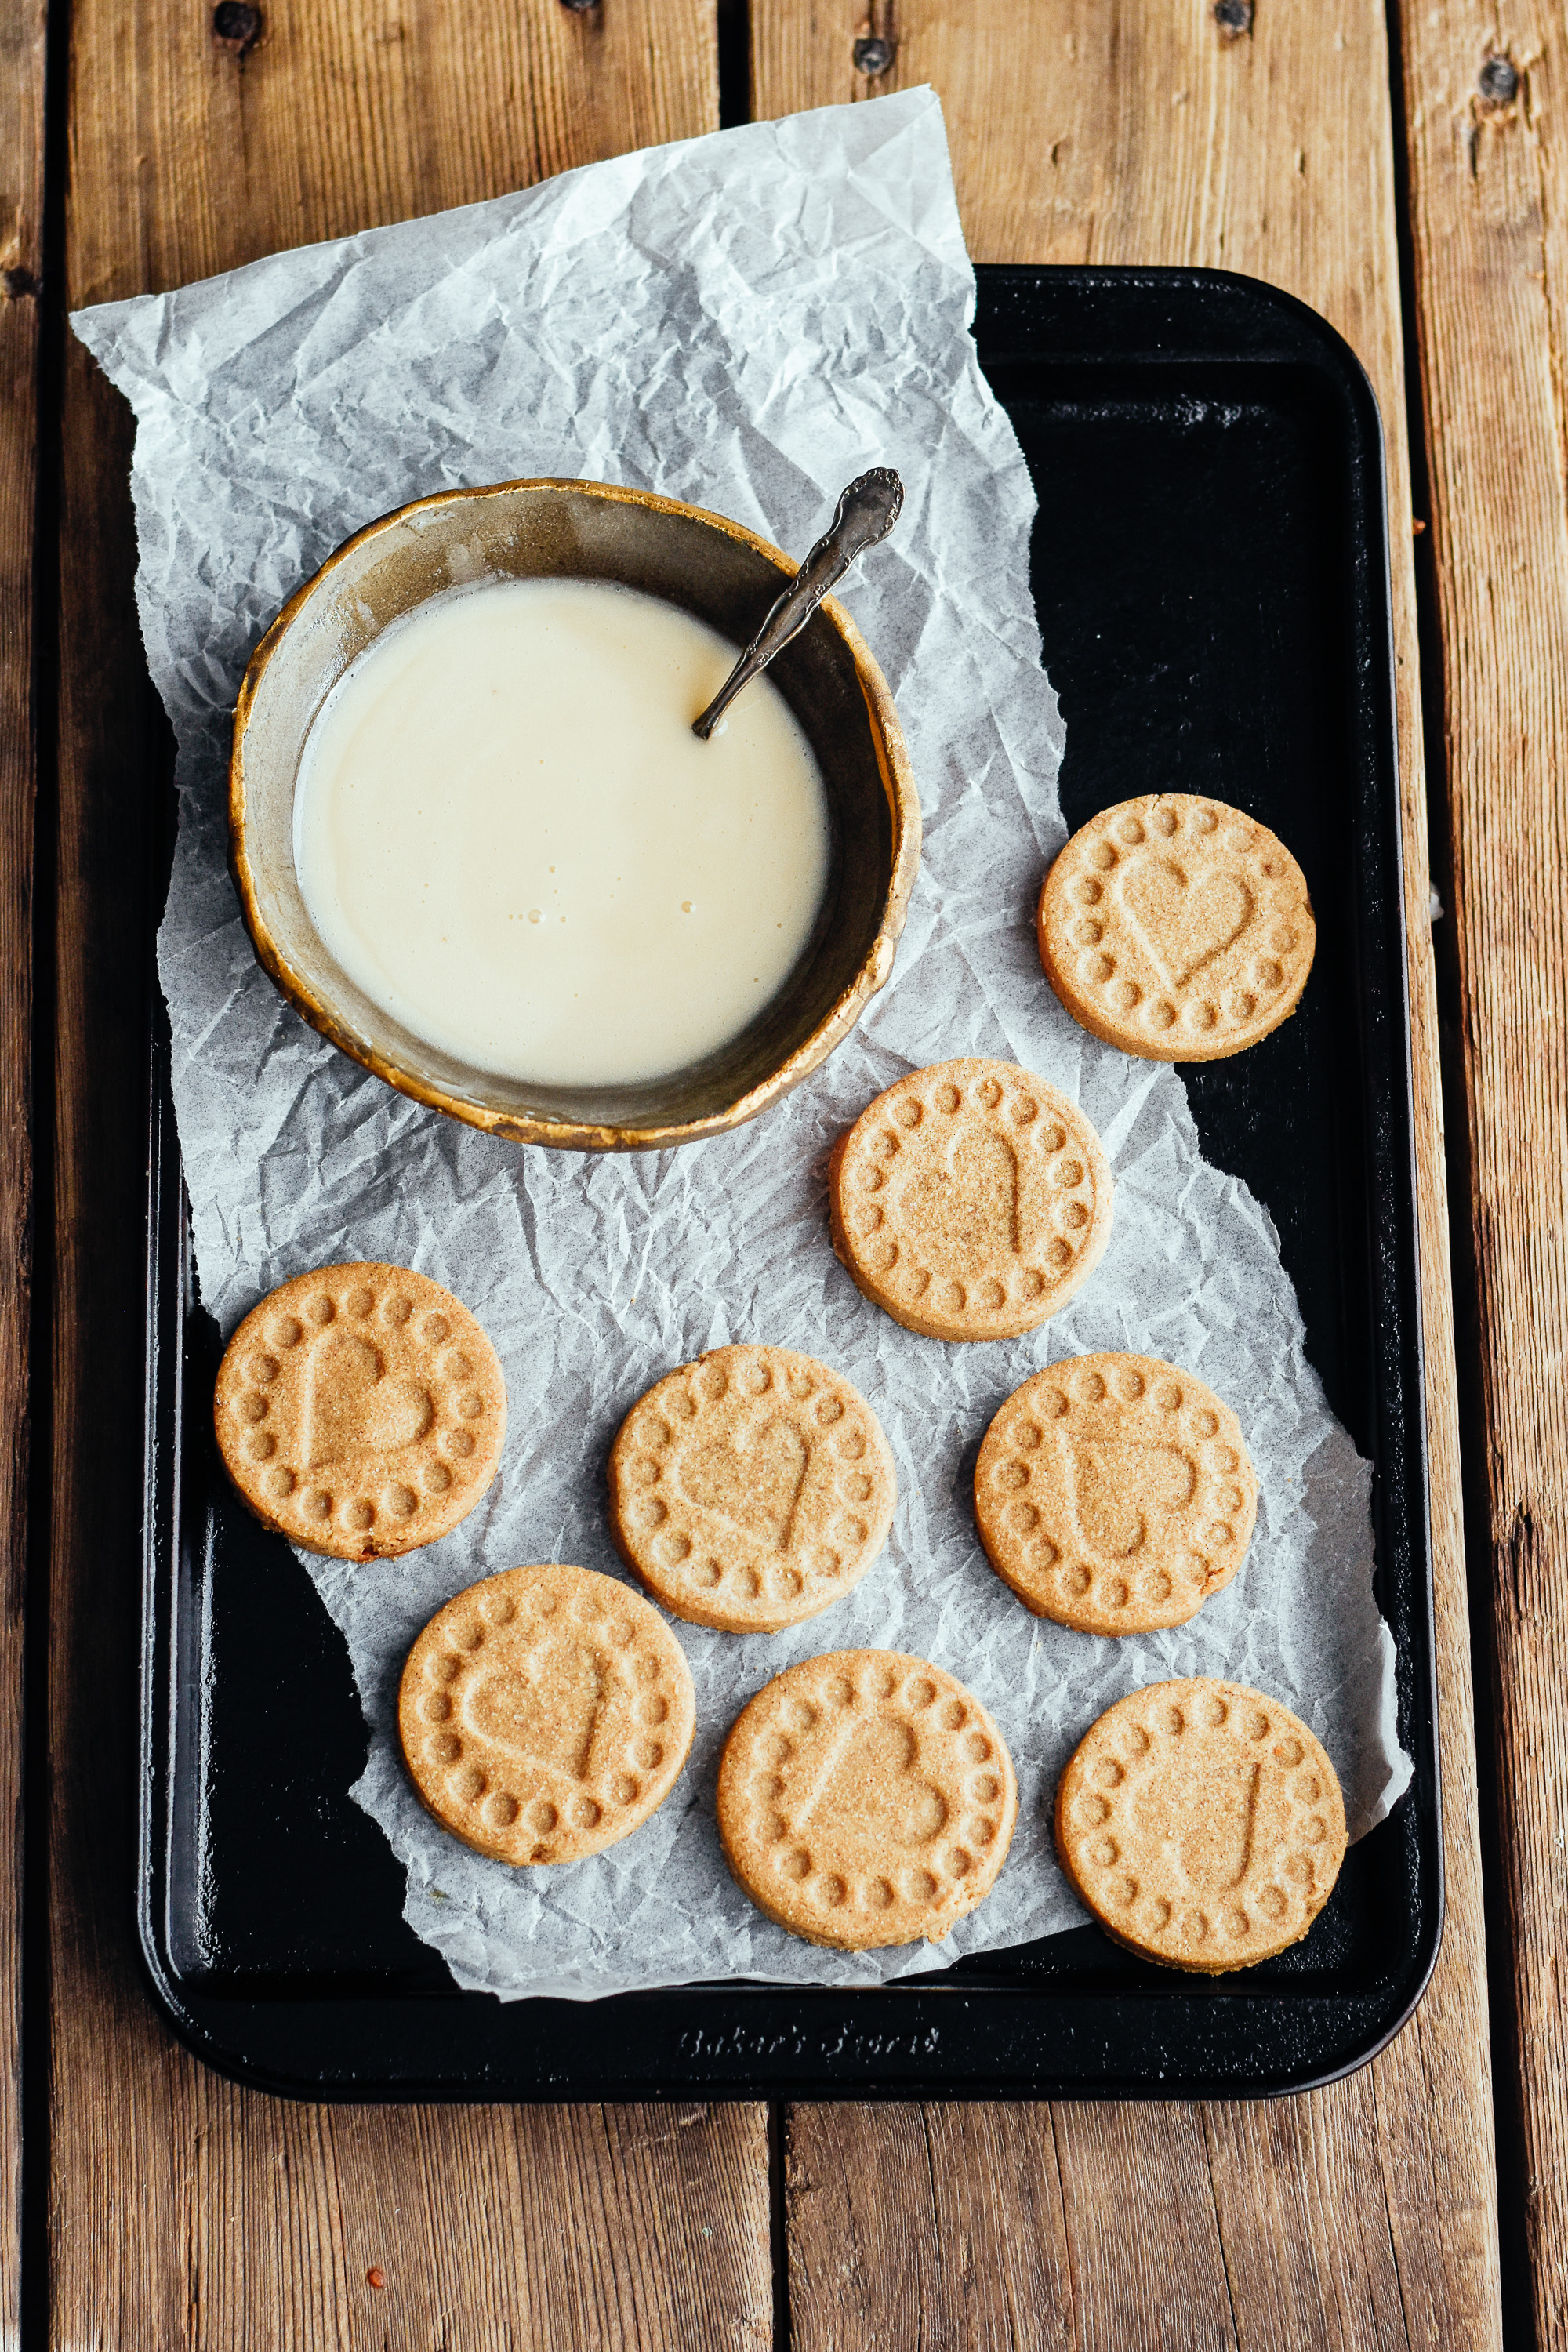
Glaze if desired, recipe below.
maple glaze
recipe: Rebecca Firth- Displaced Housewife - The Cookie Book
ingredients
2 cups powdered sugar
1 tablespoon maple syrup
1/2 teaspoon maple extract, optional
4 tablespoons milk, or more to thin
to make
Whisk together powdered sugar, maple syrup, and maple extract in a small bowl. Add milk until you have a thin glaze. Dip a test cookie, letting excess drip back into the bowl, and set the cookies back onto the cooling rack to set. You want the glaze to be thin enough so that you can still see your design clearly. Add more milk as needed!
Store in an airtight container. These cookies freeze well.
The Cookie Book is Copyright 2018 Rebecca Firth, and was published by Page Street Publishing in 2018.
Happy cookie baking!