
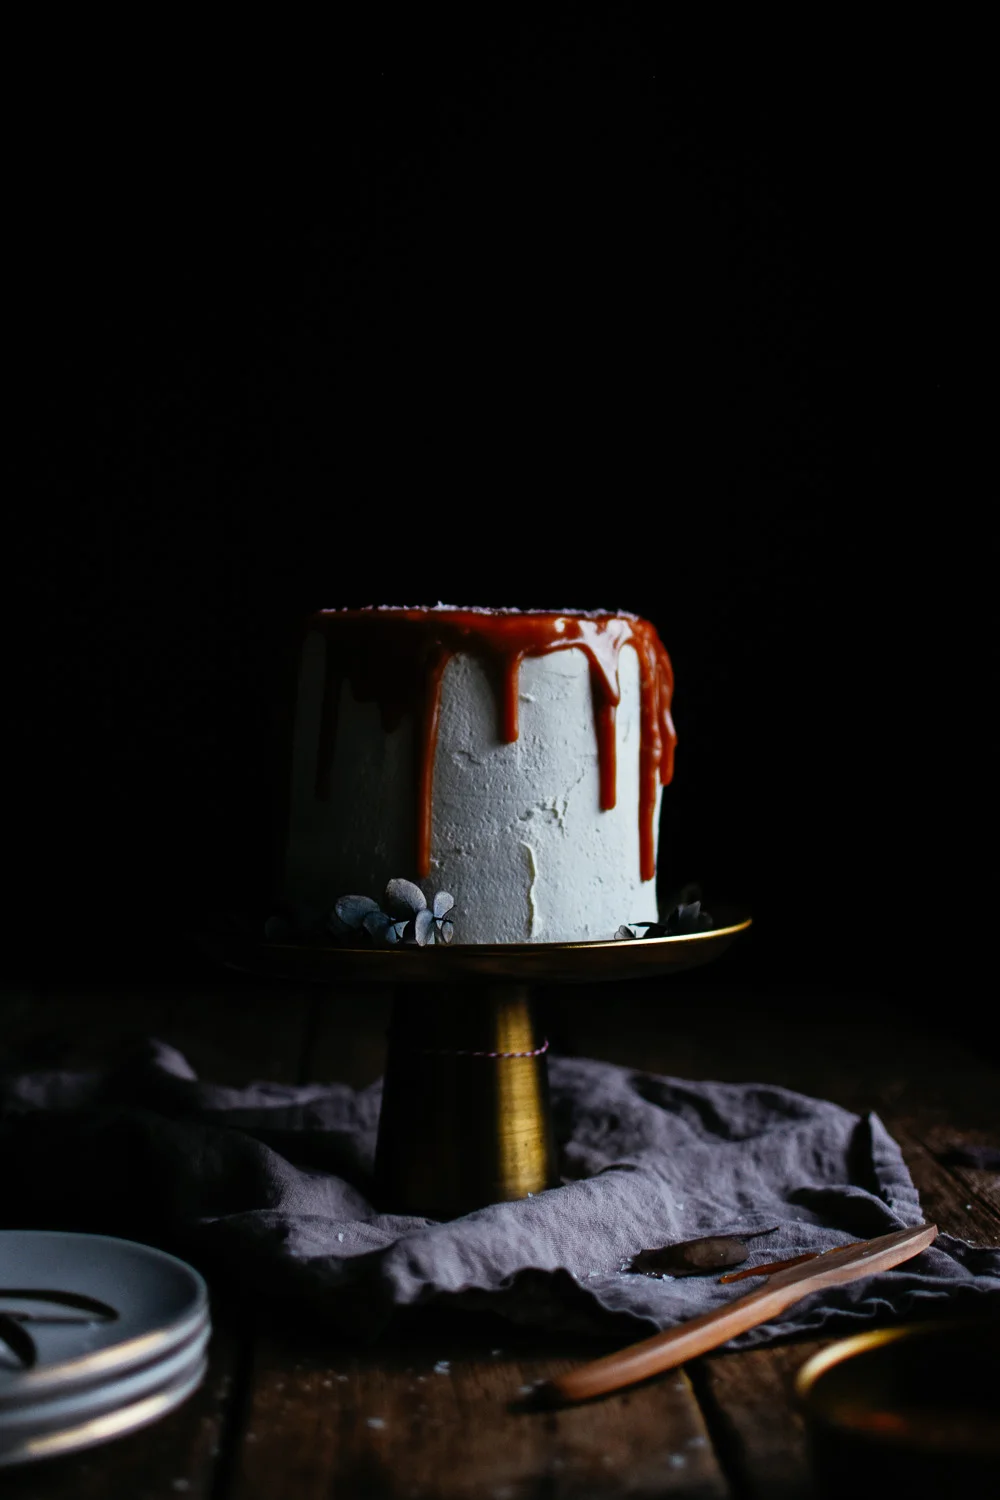
salted caramel drippy cake


Oh hey friends! I conquered one of my great baking fears! I made it out alive! Three cheers for that!
But seriously...I've had a serious fear of trying to drip anything onto cakes for a long time. I kept seeing drippy cakes pop up on instagram and pinterest (*cough cough I'm looking at you Tessa!), and they looked so gorgeous, but I was sure that I would fail. Ha! (Also maybe was still traumatized by amy and kelsey's great cake disaster of 2016....where we tried to channel our inner Katherine Sabbath).
So, drippy cakes tend to have 1 of 2 problems. Your chocolate/caramel/etc is either too thin, and you end up with puddles at the bottom of your cake, and possibly transparent drip lines...ugh. Or, your chocolate/caramel/etc is too thick, and you get giant chunky drips, and a lot of lines wherever it starts to harden before you've smoothed it out. Honestly, it all tastes amazing, but I knew that I was going to be super anal about it...so I decided just to put it off, potentially forever. Ha!
Anyhow....I sucked it up, made delicious salted caramel, and gave it a go! My number one tip is: practice on the back of the cake, or on a practice cupcake or something to test your drip speed. It's pretty obvious once you start whether or not your sauce is too thick or thin. In my opinion it's better to start on the thick side, and then slowly warm up your sauce a little and try again! My first few drips were a bit thick, so I warmed my caramel up and voila! I had nearly perfect consistency. And if you go to far when warming up your sauce, just place it back in the fridge for a few minutes, and let it firm up again.
Honestly, even if your drips don't turn out, everyone will still love you because this cake is delicious. True story.

Chocolate Cake
(adapted from Our Treasured Recipes by Central Heights MB Church)
Ingredients:
3 cups Flour
2 cups Sugar
2 tsp Baking Soda
1 tsp Salt
2/3 cup Cocoa
1 TBSP Vanilla
2 TBSP Vinegar
3/4 cup butter, melted (can be subbed with oil)
2 cups Warm Water
Instructions:
1) Mix together all dry ingredients; then pour all wet ingredients over top and mix until moist.
2) Pour batter into three, greased, 6-inch cake pans.
3) Bake at 350: for 35-40 minutes for cake [or until a toothpick comes out clean].
*Note: This cake freezes extremely well, so I like to make it ahead of time occasionally, and pop it in the freezer. It's best to level the cakes once they're cool, then wrap in plastic wrap, place in an airtight container, and place in the freezer. A cold cake is also easier to decorate as the crumb doesn't come off as easily!
Salted Caramel
ingredients:
1 cup sugar
6 tablespoons butter, roughly chopped
1/2 cup heavy cream
1 tsp salt
directions:
In a medium saucepan, heat sugar over medium heat. Stir sugar constantly using a wooden spoon or heat resistant spatula (don't use a whisk! the sugar will melt onto each tine and make it such a pain to clean!). The sugar will start to clump together, so keep stirring. It will then begin to melt into a light amber liquid. Continue cooking until all sugar is melted, and the liquid is a dark amber (but careful not to burn it!). Add in butter and stir rapidly. When butter is completely melted and incorporated, stir in heavy cream. The mixture will bubble up quite a bit, so be careful! Keep stirring and allow mixture to cook for a minute or two. Remove from heat and stir in the salt. Allow to cool, and the caramel will thicken. Let it cool to room temperature, and then place in the fridge in an airtight container.
Assembly
Once your caramel is made, and cakes are baked, you'll want to make your frosting. I used leftover mascarpone icing for this cake, but I would perhaps recommend a good swiss meringue butter cream instead!
Use a large serrated knife to carefully level the tops of your cakes. Place the first layer onto a cake plate or cake stand, dollop a generous amount of icing onto it, spread evenly, place the next layer on top, and repeat. Spread a thin layer of icing over the entire cake (using a cake makes this nice and easy!), and then place the cake in the fridge or freezer for 15 minutes to allow the icing to set. Finally, do a final coat of icing over the whole cake. I recommend keeping it fairly smooth (don't go crazy with any rustic swoops here), as you'll want the caramel to have an easy path to drip down.
Now, the moment of truth! Place your caramel into a large piping bag with either a round tip, or snip off the tip of the bag. Try piping a test drip onto your cake to test the consistency. You want the caramel to run down the cake, but not too quickly. The goal is for it to stop without puddling at the bottom, but not be too stiff that it doesn't drip at all. Warm up your caramel or place back in the fridge as needed. Work your way around the cake, creating drips of varying lengths by pipping more or less caramel on. Finally, fill in the rest of the top of the cake with caramel. Sprinkle with flaked salt if desired. Serve and enjoy!


Moral of the story: Go out and conquer one of your baking fears! You never know, you might just surprise yourself!
-Kelsey