
orange blossom cake & frosting with lemon curd filling - a very dreamy orchard shoot


I’ve hardly made any layer cakes in the last year. Not surprising, since they’re usually reserved for birthdays, celebrations, and gatherings of people. My love language is definitely feeding people, and it’s been tough to not be able to bake and share like I usually do; to not have a reason to whip up something special, to experiment with new flavours that a friend requested, or place dibs on bringing dessert to family gatherings.
Last March was when the concept for this shoot first started. I asked my friend Kristie (from The Sweet and Simple Kitchen) if she would like to put together an orchard shoot together during peak apple blossom, and we excitedly started planning. A couple weeks later we entered our first lockdown…and the world felt unknown and scary. To be honest, it still feels that way most days. But we were finally able to make it happen this year, and it felt extra special, as there is a light at the end of this tunnel we’ve all been living in for the past year and a bit.
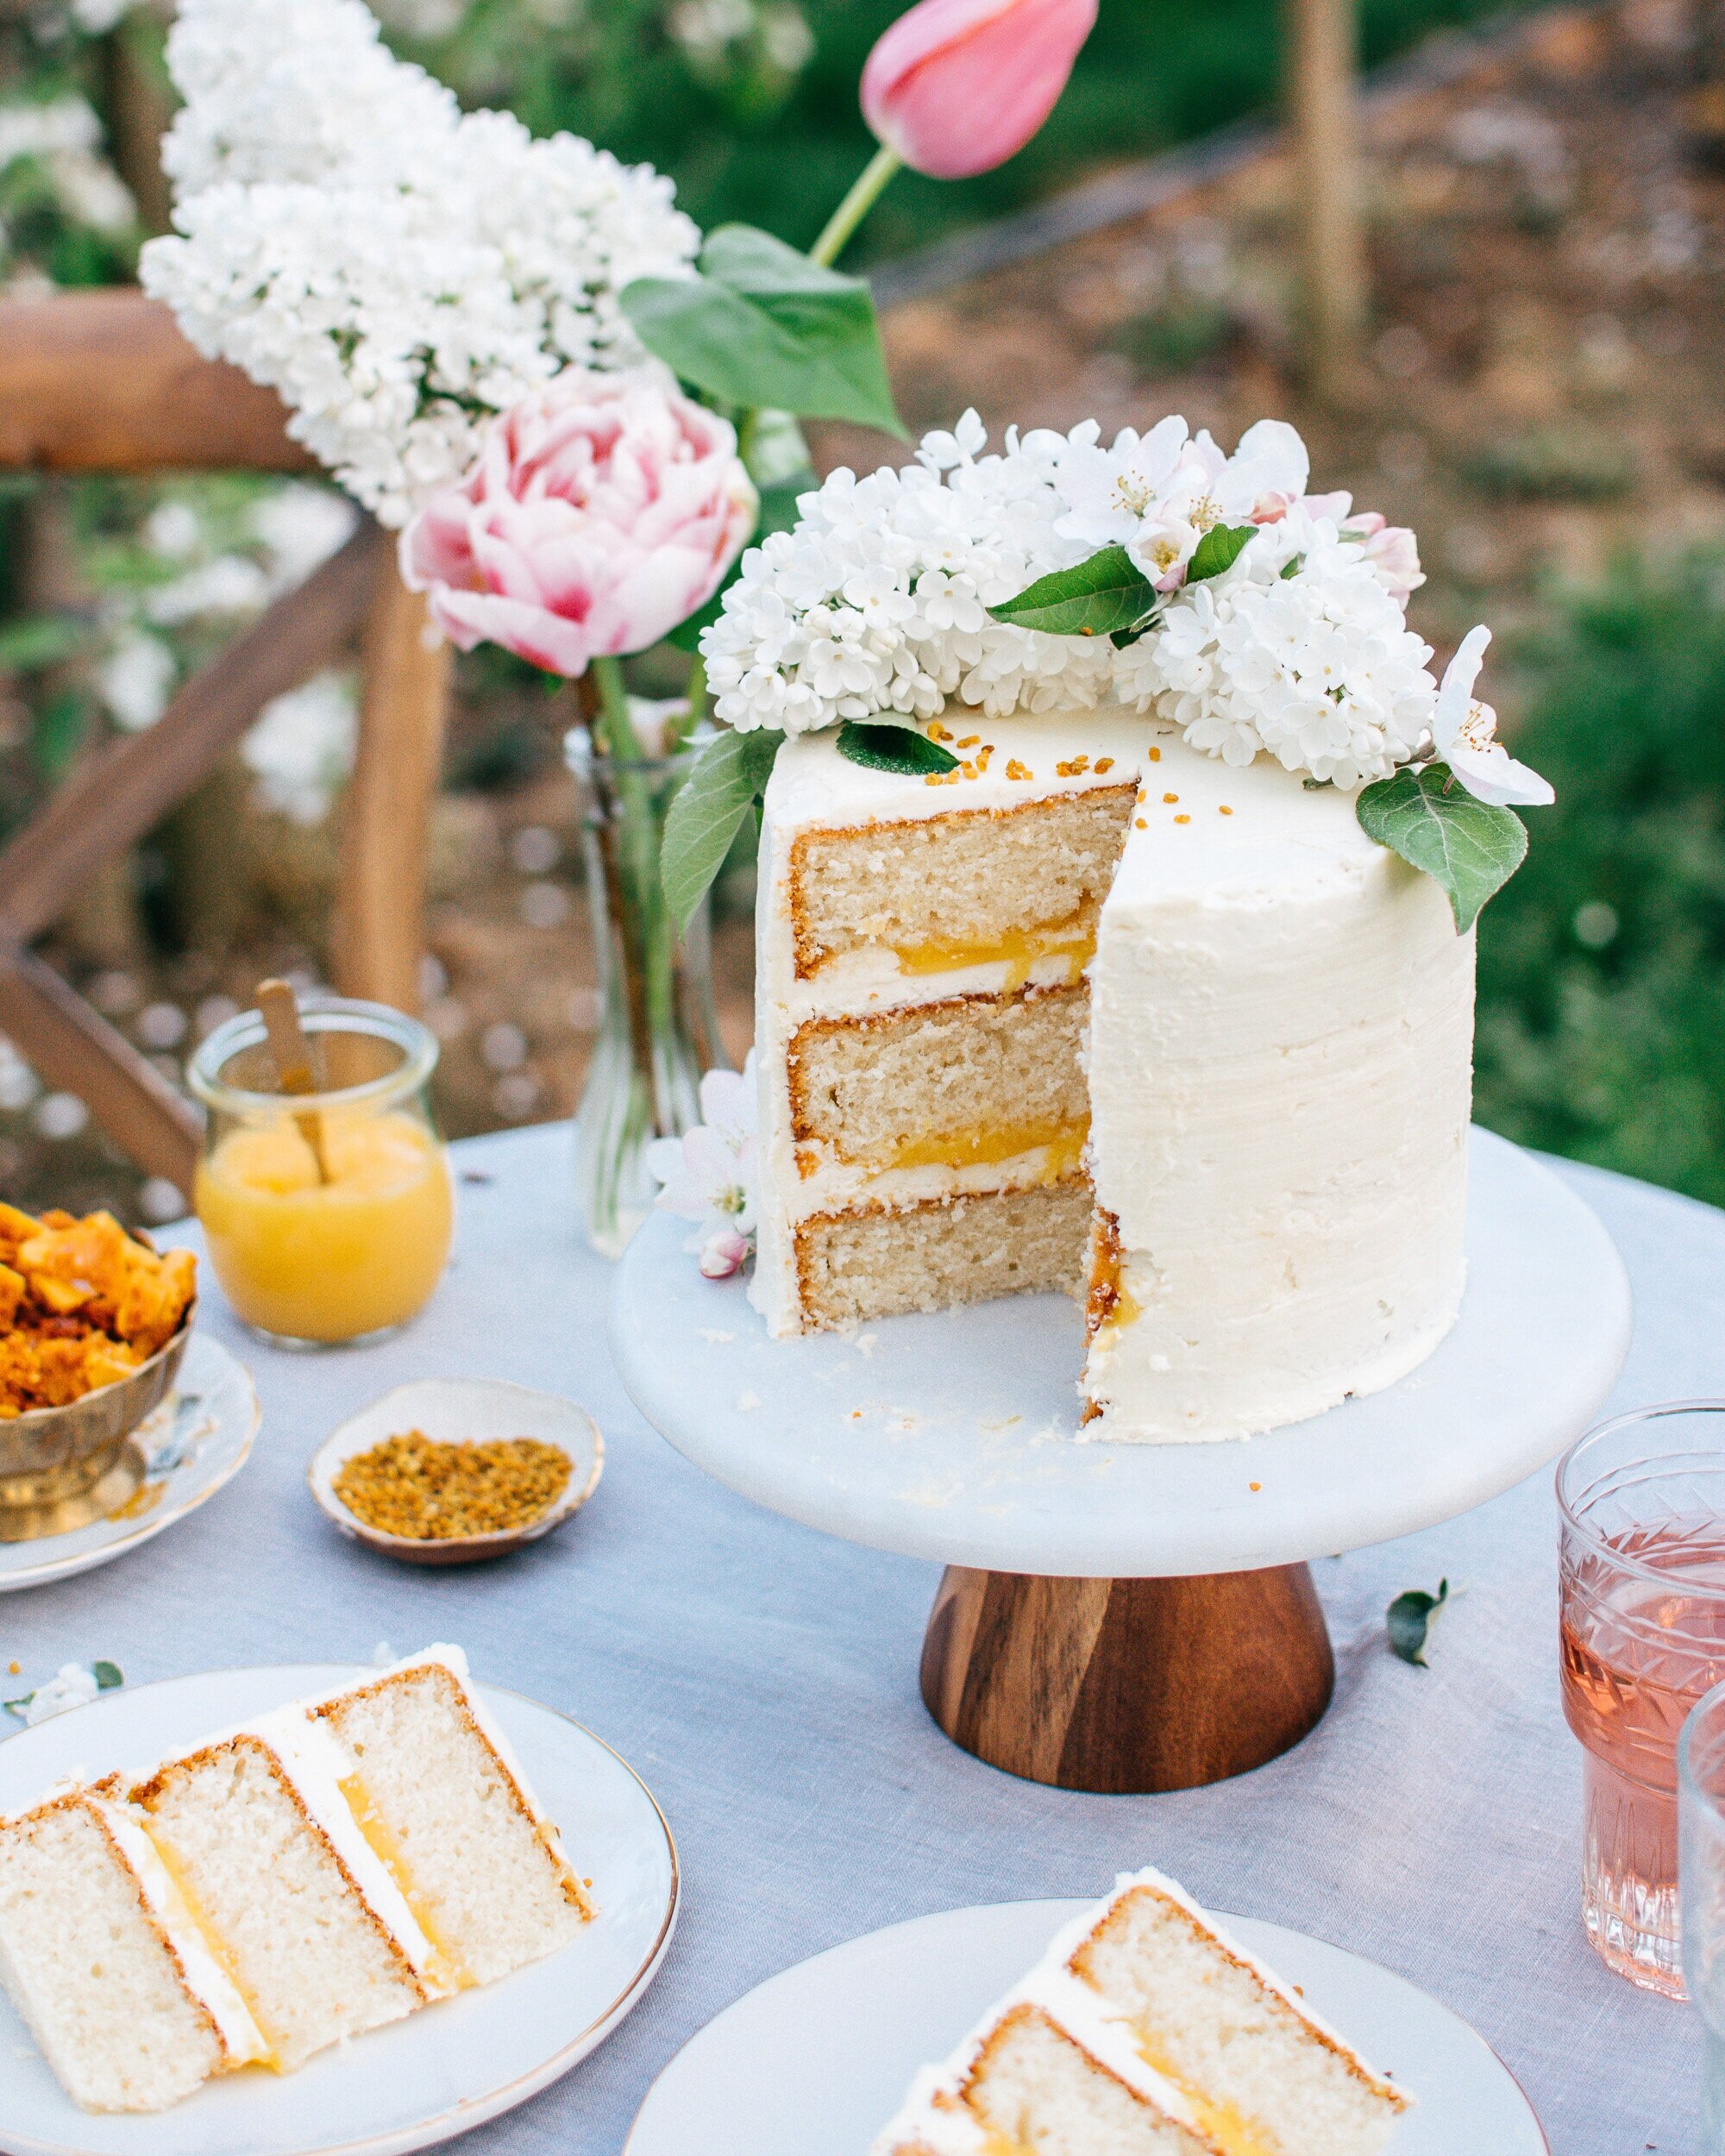
Orange blossom cake with orange blossom frosting. Delicate flavours felt appropriate for the setting.
There’s a generous layer of lemon curd between each cake layer. And we served the cake with a touch of bee pollen and homemade honeycomb (find the recipe for it over on Kristie’s blog HERE). Yes, we were quite committed to the orchard theme, and the hum of honeybees around us while we set up this shoot was enchanting.
Haven’t heard of orange blossom flavour? Orange blossom water is used in various cuisines around the world, specifically Middle Eastern, French, and Mediterranean! It is exactly what it sounds like…orange blossoms from bitter oranges are gently boiled in water, and the result is a fragrant, lightly floral & citrus-y flavour. Most kitchen stores, International aisles of grocery stores, and many places online carry it. The closest substitute I would suggest would be to use a bit of orange zest and vanilla in its place (see note below recipe).
P.S. We took approximately 1 MILLION photos of this shoot…so keep scrolling for all the beautiful details, and be sure to pop over to Kristie’s blog post for even more goodness <3
orange blossom cake with orange blossom frosting & lemon curd
recipe: Kelsey Siemens
yields:
ingredients
¾ cup (180 mL) egg whites (about 6 eggs)
1 teaspoon orange blossom water (or sub 1 tsp vanilla + 1 tsp orange zest)
¾ cup (180 mL) milk, divided
¼ cup (58 g) plain, full fat greek yogurt (regular plain yogurt)
2 tablespoons lemon zest (about 2 lemons)
1 ½ (300 g) granulated sugar
1 cup (240 mL) canola oil
2 cups (250 grams) cake flour
1 cup (125 g) all purpose flour
1 tablespoon baking powder
to make the cake
Preheat the oven to 350 degrees F. Grease three 6-inch round cake pans (with straight, 2-inch tall sides) and set aside.
In a small bowl, whisk the egg whites, vanilla extract, and 1/4 cup milk together, and set aside.
In the bowl of a stand mixer fitted with a paddle attachment, mix the flour, sugar, baking powder and salt together on low until combined. Add in the oil and 1/2 cup of milk, and mix on low until just moistened. Scrape down the sides and bottom of the bowl with a spatula, and then turn the mixer to medium-high and mix until completely combined.
With your mixer on medium-low, slowly stream in the egg white and milk mixture. Add it in 3 batches, where each addition should take about 15 seconds to stream in. Ensure each batch is completely incorporated before adding the next. Stop the mixer before the last addition is completely incorporated, and finish mixing by hand, using a spatula to fold together, scraping down the sides and bottom of the bowl as you go. Try not to overmix at this point!
Distribute the batter between the prepared pans. I like to use a kitchen scale to make sure an even amount is in each one, but you can just eyeball it.
Bake at 350 degrees F for 25-30 minutes or until a toothpick inserted into the center of the cake comes out clean. I like to carefully rotated my pans a couple times while cooking to ensure even heating.
Allow cakes to cool for at least 5-10 minutes before removing from pans and cool completely on a cooling rack. Use a large serrated knife to level the tops of each one before assembling the layer cake.
Cool cakes completely before frosting. I like to make the cake the day (or even week) before, store them in an airtight container, and keep them in the fridge or freezer to keep fresh. Chilled cake layers are easier to handle, and means less crumbs in your icing. If storing cake in your freezer, remove and place in your fridge 3-4 hours before assembly, or overnight, to let it thaw before frosting.
To assemble the cake:
Once cakes are cool and level, place the first layer upside down onto your cake plate (this reduces the amount of crumbs as the cut part is face down). Spread frosting in an even layer, but come up slightly along the edge of the cake layer to create a small barrier for the compote. I use about two scoops of frosting from a 2.5-inch ice cream scoop between each cake layer so that I know my frosting layers will be even. Next, spread a layer of lemon curd on top of frosting. Again, I’ll use 1 or 1.5 scoops using the ice cream scoop. Repeat for the next layer.
When the final cake layer is placed on top (remember to place it upside down to reduce crumbs), spread a very thin layer of butter cream over the entire cake as your crumb coat. Now is a good time to check how straight your cake is standing, and gently adjust the layers if possible so that it’s standing straight. I like to place my cake scraper along one side and push from the other side to get it perfectly level.
Move the cake into the fridge or freezer for 10-15 minutes to firm up. (Don’t let it get too cold though or the frosting may harden too much when it hits the cold cake).
Finally, frost the cake. scoop more frosting onto the chilled crumb layer, and use a butter knife or cake scraper (also called icing smoother) to smooth out the frosting. Or you can keep it more rustic and swirly, and have a thicker layer of frosting.
orange blossom swiss meringue frosting
ingredients
½ cup (120 mL) egg whites (about 4 eggs)
1 cup (100 g) granulated sugar
pinch of salt
1 1/4 cup (284 g) unsalted butter, cubed - room temperature
1/2 teaspoon orange blossom water (or to taste)
1/2 teaspoon vanilla extract
to make the frosting
Prepare a double boiler: Simply fill a medium-large saucepan with a few inches of water, and bring to a simmer. In a metal bowl that will sit on top of the saucepan without touching the water, place the egg whites and sugar and whisk together until just combined, this is to keep the eggs from cooking by themselves!
Keep stirring the mixture occasionally, and cook until the sugar is completely dissolved, and the temperature hits 160 degrees F. Don’t whisk vigorously here, or you’ll start forming your meringue prematurely. Remove from heat once it reaches temperature, and pour into the bowl of a stand mixer fitted with a whisk attachment.
Beat the mixture for 7-8 minutes on high, until it has cooled to room temperature, and forms shiny, medium stiff peaks.
Switch to a paddle attachment, add in salt, orange blossom water, and vanilla extract. Then, with the mixer on low, add in butter 1 tablespoon at a time. Mix well after each addition. This is where problems may occur if the meringue wasn’t cooled down enough, or if the butter was too cold, etc. See notes at the end for troubleshooting.
Store in an airtight container in the fridge (or freezer) if you're not using it right away! Let it sit on the counter to soften up before icing a cake with it, you may need to re-whip it for a few minutes to get its smooth texture back.
Troubleshooting: Swiss Meringue Frosting can be fussy, so here are some tips!
Our goal temperature for the butter cream is about 72-74 degrees F (I learned this tip from Stella Parks, and swear by it!). The meringue should be cooled to about 90 degrees F before we add any butter! The butter should be about 65 degrees F before adding to the meringue, otherwise it may turn lumpy and curdled.
Soupy meringue? Simply place it back into the fridge for about 15-20 minutes, and then re-whip for a full 4 minutes and it should come together, seriously...just keep whipping!
Lumpy or curdled meringue? It may look thick, or even weirdly thin but separating, but in both instances you actually need to heat it up a little. Simply place the bowl back on the double boiler, and heat until the frosting starts to melt a little on the sides of the bowl. Place back in the stand-mixer and whip for another 4 minutes.
lemon curd
ingredients
½ cup (120 mL) fresh lemon juice - about 3 to 4 lemons
1 tablespoon lemon zest (about 1 lemon)
2/3 cup (133 g) granulated sugar, dependent on tartness level desired
4 large egg yolks
½ cup (113g) salted butter, cubed
to make the lemon curd
Place a fine mesh sieve over a heatproof bowl, and set aside.
In a medium, nonreactive saucepan (stainless steel or enamel work well), combine all ingredients and heat on medium low. Whisk continuously to keep eggs from cooking separately. Cook the mixture until it starts to thicken, and the whisk starts leaving trails, about 10 minutes.
The curd should be done when the first bubble appears on the surface, and has reached 170 degrees F. If it has not thickened after 10 minutes, simply turn the heat up slightly, and keep cooking. Remove from heat and strain through the prepared fine mesh sieve to remove any stray egg whites if necessary, and to remove the lemon zest for a perfectly smooth curd. Allow to cool to room temperature before transferring to an airtight container in the fridge. Place a layer of plastic wrap on top of the curd to keep a film from forming if desired. Keep refrigerated until ready to serve. Curd will keep up to one week in the fridge.
Note:
Using a reactive saucepan such as aluminum or unlined copper can cause the acid from the lemons to discolour and have an unappetizing metallic taste, so be sure to use a non-reactive saucepan and utensils. Stainless steel or enameled cookware are good choices.
Variations: Use grapefruit or lime in place of the lemon for different flavours of curd!


Happy cake baking!
-Kelsey


